
What You Will Find Here
This article explains how to:
- Select a feedback channel type
- Configure the Basic Information tab
- Customize the Theme tab
- Configure Advanced Settings
- Set up Digest Configuration and Email Settings
- Configure Notification Settings
Who Can Access?
This article applies to users who have access to the Channels section in Pisano.
How to Access
- Open the main navigation menu.
- Click Channels.
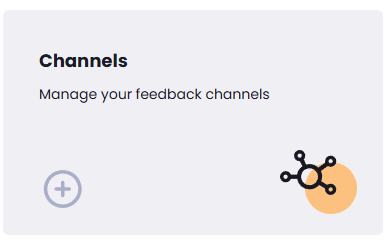
You will arrive at the main Channels page, where you can create, manage, and configure feedback channels.
What You Can Do Here
Selecting Your Channel Type
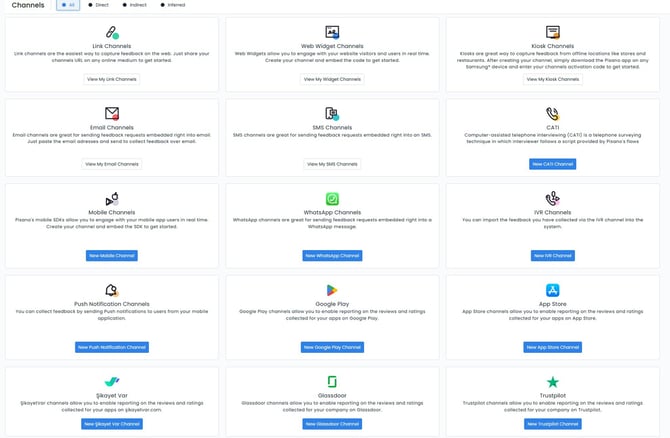
Before creating a channel, you must choose the communication method you want customers to use when submitting feedback. Pisano supports multiple channel types, including Link, Email, Web Widget, Mobile, WhatsApp, and others. The available options on the page change based on the channels that already exist in your workspace.
- Open the Channels page.
- Review the available channel categories.
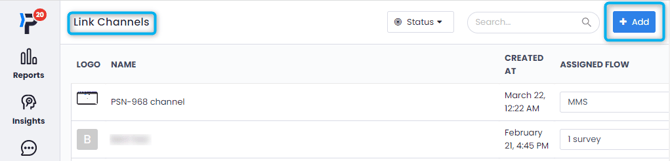
- If channels already exist for your selected category, click View My [Type] Channels.
- Click the blue + Add button in the upper right corner of the page.
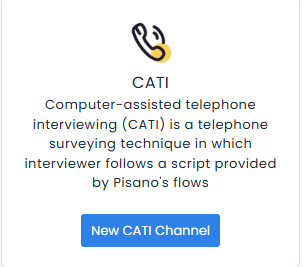
- If no channels exist for that category, click New [Type] Channel.
- Continue to the channel creation wizard.
After you complete these steps, the multi tab configuration wizard opens for the selected channel type.
Notes
- The available buttons change depending on whether channels already exist in the selected category.
- The overall setup process is similar across channel types, although individual configuration options may differ.
Basic Information Tab
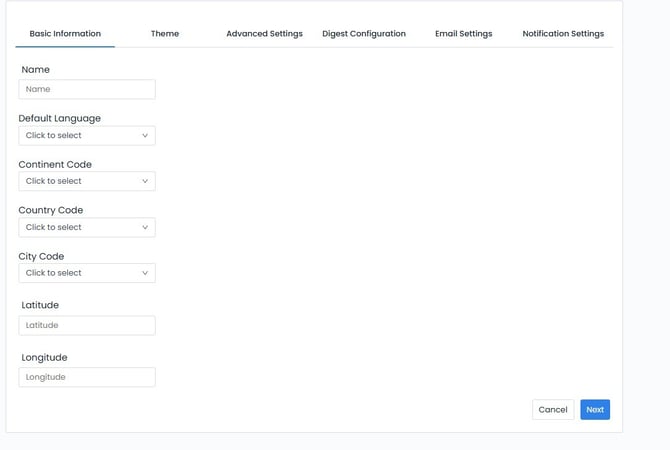
The Basic Information tab defines the channel identity and location details. Complete each field before continuing to the next step of the configuration process.
- Enter a unique and recognizable name in the Name field.
- Open the Default Language menu and select the primary language for customer interactions.
- Open the Continent Code menu and choose the appropriate continent.
- Open the Country Code menu and select the country where the channel operates.
- Open the City Code menu and select the operating city.
- Enter the location's latitude in the Latitude field.
- Enter the location's longitude in the Longitude field.
- Click Next.
After you complete these steps, Pisano saves the channel identity, language, geographic information, and location coordinates. The setup wizard then moves to the Theme tab.
Notes
- Choose a channel name that makes the channel easy to identify later.
- You can click Cancel at any time to leave the setup wizard.
Theme Tab
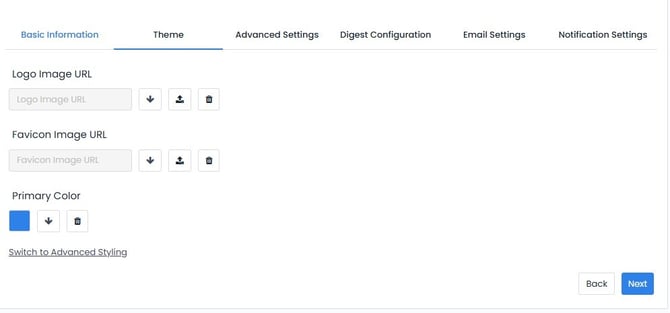
The Theme tab allows you to apply your organization's branding to the feedback channel. You can configure visual assets, choose interface colors, and access advanced styling options before continuing with the setup.
- Enter the direct URL of your company logo in the Logo Image URL field.
- Use the available Download, Upload, or Delete buttons below the field to manage the logo asset.
- Enter the direct URL of your browser tab icon in the Favicon Image URL field.
- Use the available Download, Upload, or Delete buttons below the field to manage the favicon.
- Select the Primary Color field to open the color picker.
- Choose the primary color that matches your brand.
- Use the available asset management controls next to the color picker if you need to clear or update your selection.
- If you need additional styling options, click Switch to Advanced Styling to open the CSS editor.
- Click Next.
After you complete these steps, Pisano applies the selected branding assets and interface colors to the channel. The setup wizard then continues to the Advanced Settings tab.
Notes
- Click Back at any time to return to the Basic Information tab without losing your changes.
- Use image URLs that are publicly accessible so the assets can be loaded correctly.
Advanced Settings Tab
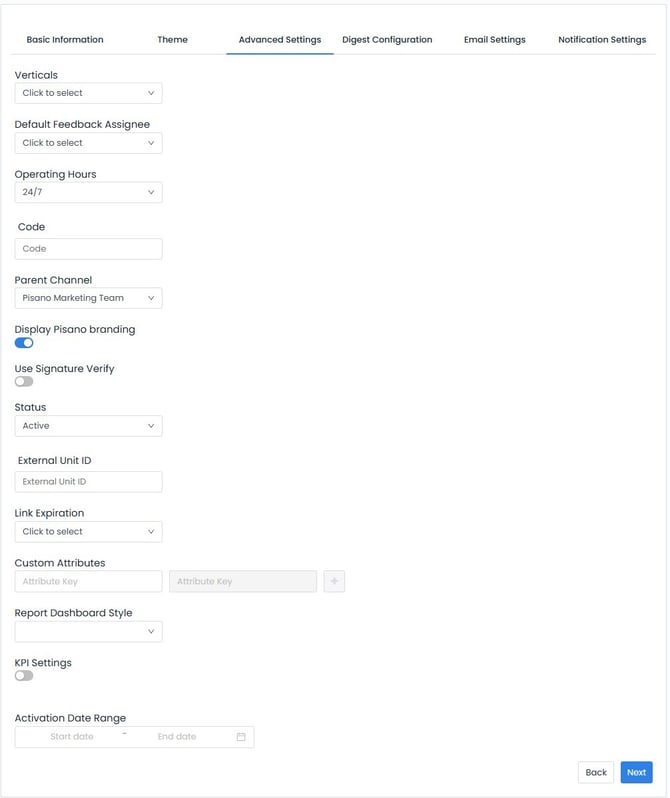
The Advanced Settings tab controls how the channel operates within your workspace. You can configure routing rules, organizational hierarchy, reporting preferences, tracking values, and activation settings before completing the remaining setup steps.
- Open the Verticals menu and select the industry that best matches your organization, such as Banking, Retail, Restaurant, Hospitality, Event, Medical, Transportation, or Gas Station.
- Open the Default Feedback Assignee menu and choose the user who will receive newly created feedback by default.
- Open the Operating Hours menu and select your business hours. The default value is 24/7.
- Enter your internal classification value in the Code field.
- Open the Parent Channel menu and select the parent channel if this channel belongs to a larger channel structure.
- Turn the Display Pisano Branding switch on or off based on your branding preferences.
- Turn the Use Signature Verify switch on if signature verification is required.
- Open the Status menu and select the channel status. The default status is Active.
- Enter the required external identifier in the External Unit ID field if the channel connects to another system.
- Open the Link Expiration menu and define how long generated links remain active.
- In the Custom Attributes section, enter an Attribute Key and click the + button to add the attribute.
- Open the Report Dashboard Style menu and select the preferred dashboard layout.
- Turn the KPI Settings switch on or off to control KPI tracking for the channel.
- Use the Activation Date Range calendar fields to select the channel's start and end dates.
- Click Next.
After you complete these steps, Pisano saves the operational settings, routing rules, hierarchy, reporting preferences, tracking values, custom attributes, and activation schedule for the channel. The setup wizard then moves to the Digest Configuration tab.
Notes
- The options described above are based on the configuration of a Link Channel.
- Most channel types use the same setup wizard, although available settings can differ depending on the selected channel type.
Digest Configuration and Email Settings
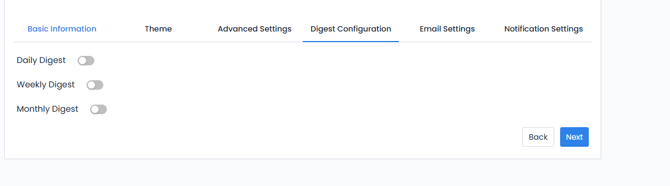
These tabs allow you to configure recurring summary emails for your team and automatic email communication for customers who submit feedback through the channel.
Digest Configuration
- Turn on the Daily Digest switch to send daily summary emails.
- Turn on the Weekly Digest switch to receive weekly summary reports.
- Turn on the Monthly Digest switch to receive monthly summary reports.
- Click Next to continue to the Email Settings tab.
After you complete these steps, Pisano saves the selected digest schedule for the channel.
Email Settings
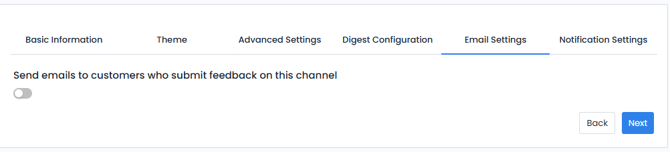
- Turn the switch on to send an automatic confirmation or thank you email after each feedback submission.
- Click Next.
After you complete these steps, customer confirmation emails are enabled for the channel, and the setup wizard moves to the Notification Settings tab.
Notification Settings
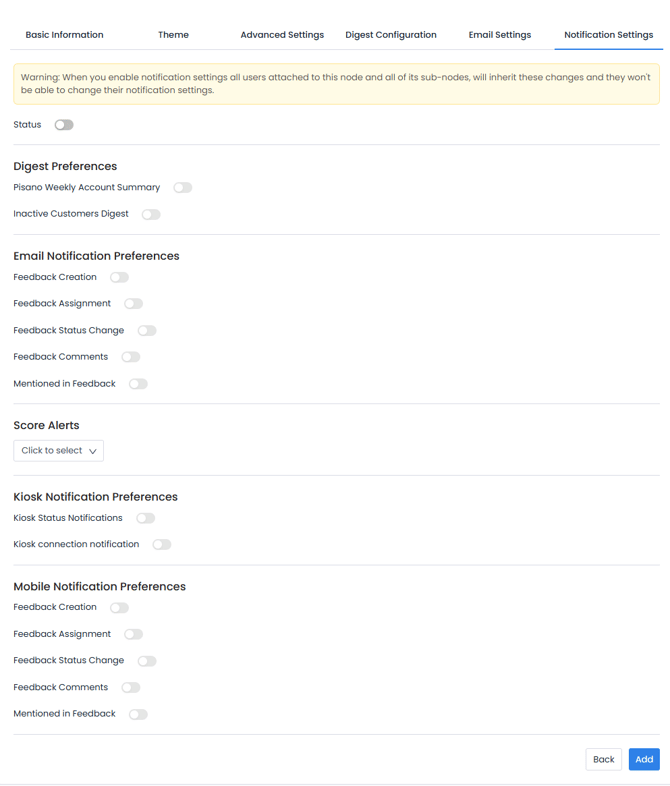
The Notification Settings tab controls how users receive updates about channel activity. You can configure email notifications, mobile notifications, digest preferences, score alerts, and kiosk notifications before creating the channel.
- Turn on the main Status switch to enable custom notification settings.
- Under Digest Preferences, turn on Pisano Weekly Account Summary if you want to receive weekly account summaries.
- Turn on Inactive Customers Digest to receive notifications about inactive customers.
- Under Email Notification Preferences, turn on Feedback Creation to receive an email whenever new feedback is submitted.
- Turn on Feedback Assignment to receive email notifications when feedback is assigned.
- Turn on Feedback Status Change to receive email notifications when the status of feedback changes.
- Turn on Feedback Comments to receive email notifications for new internal comments.
- Turn on Mentioned in Feedback to receive email notifications when another user mentions you.
- Open the Score Alerts menu and configure the satisfaction score threshold that triggers an alert.
- Under Kiosk Notification Preferences, turn on Kiosk Status Notifications to receive kiosk status updates.
- Turn on Kiosk Connection Notification to receive notifications when a kiosk loses or restores its internet connection.
- Under Mobile Notification Preferences, turn on Feedback Creation to receive mobile push notifications for new feedback.
- Turn on Feedback Assignment to receive mobile push notifications for assigned feedback.
- Turn on Feedback Status Change to receive mobile push notifications when the feedback status changes.
- Turn on Feedback Comments to receive mobile push notifications for internal comments.
- Turn on Mentioned in Feedback to receive mobile push notifications when another user mentions you.
- Click the blue Add button to create the channel and save all configuration settings.
After you complete these steps, Pisano creates the channel and applies all notification preferences.
Notes
- Warning: Enabling notifications through the main Status switch applies these settings to every user connected to the current node and all of its child nodes. Individual users cannot override these inherited settings.
Limits and Notes
- Creating a channel prepares it for use, but it does not begin collecting feedback automatically.
- Every channel must have a flow assigned before it can collect Voice of Customer data.
- The deployment process depends on the selected channel type. For example, a Link Channel requires a generated URL, while a Web Widget requires embedding code on your website. Kiosk and Mobile channels use different deployment methods.
- Complete the deployment process by following the Knowledge Base article for your specific channel type.
FAQs
What is a feedback channel in Pisano? A feedback channel is a method used to collect customer feedback through different touchpoints such as web widgets, links, kiosks, or mobile apps.
Do I need to assign a flow to a channel? Yes, every channel must have a flow assigned before it can start collecting feedback.
Can I change notification settings after creating a channel? Yes, you can update notification settings at any time from the channel settings page.
Will enabling notifications affect all users? Yes, enabling notifications through the main Status switch applies the settings to all users connected to the current node and its child nodes.
How do I deploy a channel after creating it? Deployment depends on the channel type. For example, link channels require sharing a URL, while web widgets require embedding code on your website.
Can I send automatic emails to customers who submit feedback? Yes, you can enable automatic confirmation or thank you emails from the Email Settings tab during channel setup.
Interactive Video
You can check our interactive video about assigning the flow to a channel: